This guide has been a long time coming, but rather than lament all the delays let’s get to it!
The venerable CZ-75 has been a staple of combat pistols on the international and US markets for decades. A great many will call it one of, if not the finest semi-automatic pistol ever built and while we could spend all day arguing over that it’s certainly earned a place alongside the greats. The proud history of Czech small arms design is long and storied, full of innovation and thumbing noses at the Soviet leadership during the reign of the USSR. It turns out the Czechs are strong, independent arms designers who don’t need no Russians telling them how to make excellent guns. Who needs a Tokarev when you have roller locked breech CZ-52s that handle the hottest submachinegun loads? Maybe a hint toward the next guide…?
In the Cold War boom years designers across the globe raced to develop their own takes on modern combat pistols. The success of the Browning Hi Power rippled far and wide, and at the dawn of the 70’s the first inklings of what would become one of the most vaunted of combat pistols started to form.
It’s a strange twist of fate that a pistol oft touted as a premier combat sidearm wasn’t developed for military contracts at all. Small arms development behind the Iron Curtain was no easy task, despite the Czech penchant for defying the mandates of their communist bloc leaders. The isolated, secretive intellectual property system of the USSR would turn out to be a boon to CZUB and the pistol’s designer, Frantisek Koucky, by way of clandestine individual patents and the fact that he was not in fact employed by the company at the time. CZ granted full creative control to Koucky, who then took inspiration from the Soviet standard TT-33 and the more recently developed Swiss SIG P-210 series pistols using elements like a modular sear assembly and a slide-in-frame arrangement to keep the bore axis low.
The earliest models produced from 1976 into the early 1980s would have one major difference from their more modern counterparts in that the frame rails didn’t extend as far forward and instead ended about where the scallop begins on pre-B and later guns. These “short rail” guns command huge premiums with CZ collectors due to their rarity; the short rail series was phased out in a few years of relatively small production and replaced by what would become the standard CZ-75 until 1997. Shortly after the short rails were phased out political strife in the early 1980s opened up sale of civilian arms to Czech citizens and the rest is firearms history. It didn’t take long for a slew of hot new Czech wonder-nines to find their way to the US, nor would it take long for arms makers in Turkey, Italy, Israel and others to cook up clones of varying quality. If you ask a CZ fan though… none of the rest can truly hold up to the tried and true original CZ-75.
While I won’t be covering the myriad of copies in this guide, I think it’s worth mentioning some of the more notable ones. Keep in mind that parts compatibility between CZ made and other companies varies wildly, though in most cases you can get away with things like hammer springs and small parts. One of the first large scale production copies came from Tanfoglio in Italy, which still makes their clones of the CZ design in a wide array of models from inexpensive barebones up to competition oriented race guns largely imported by EAA into the US under the Witness brand name. Early Tanfoglios had a spotty reputation for improper heat treats and stainless steel galling, which were par for the course for 1980s wonder-nines as stainless became a more mainstream gunmetal.
The Italian firm also built a relationship with Israel and supplied parts for the first runs of Jericho 941 pistols, which have since become one of the more famous CZ clones on the market. You’ll know one when you see it, since the Israelis decided they wanted a slide mounted safety instead of the standard thumb lever on the frame. The design has been passed around, produced in the US under license to Magnum Research as the hokey named Baby Eagle and has enjoyed a recent comeback due to the success of IWI-USA under the pistol’s original designation.
Things get a little muddier once you venture past Italian and Israeli made guns. Turkish clones of the CZ have grown in popularity over the past decade or so due to their low cost and reasonable quality, though they show significantly rougher workmanship than the others discussed so far. To their credit, however, most of the Turkish made pistols enjoy significant parts compatibility with the original CZ specifications. Tristar/Canik pistols can be found imported by Century and sold under various model names, often with ambidextrous safety levers which are a pain to disassemble. Sarsilmaz enjoyed a brief partnership with Armalite (the “new” Armalite, that is) and sold pistols under the designation AR-24, but they saw limited success. Unlike the Tristar/Canik guns, the AR-24 doesn’t share parts quite so freely.
Next episode we’ll cover a bit more of the evolution of the CZ-75 into the 1990s with the B pattern revisions along with CZ’s foray into the big bore market with the CZ-97. The timeless CZ-75 continues to evolve though, so keep an eye out in the future if I can get my hands on a P07/P09 or Omega model to talk about!
Disassembly Guide
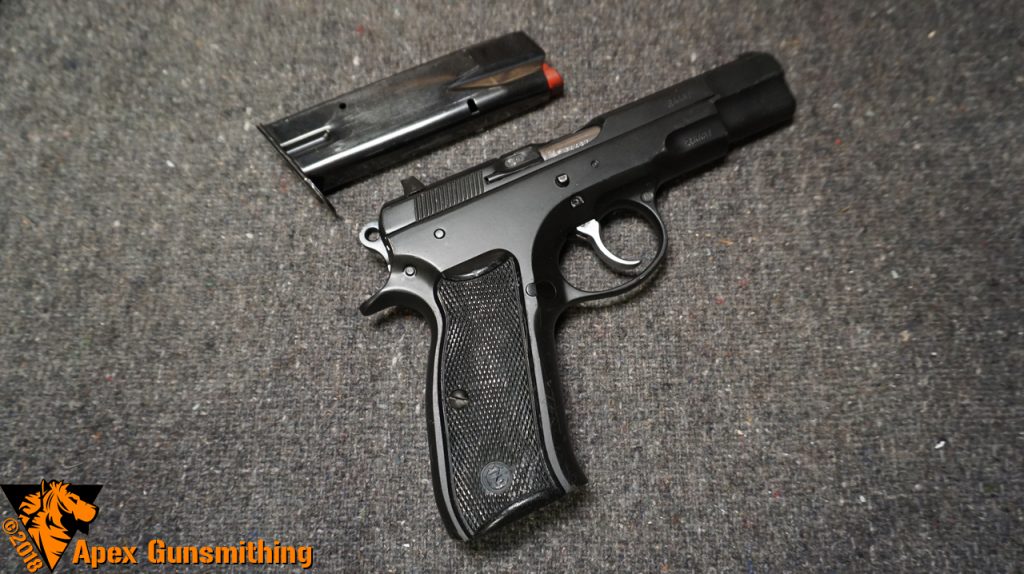
This guide will specifically cover the PRE-B pistols. What differentiates pre-B models from the later guns?
- Entirely different thumb safety detent system, which on the B models doesn’t require a tool.
- Addition of a firing pin block safety in the slide
- A trip lever in the sear group that activates the aforementioned plunger
- A narrower sear to make room for the lever
- Reshaped trigger guard and cosmetic differences, among other smaller things
Now that we’ve got that out of the way, let’s get started!
- Field strip. Clear the pistol, remove the magazine, and retract the slide slightly so the small hash marks cut into the frame and slide align. Push the slide stop out from right to left. It might require tapping a little, but don’t force it!
- Separate slide components. Another simple step, just the same as most modern cam-locked pistols.
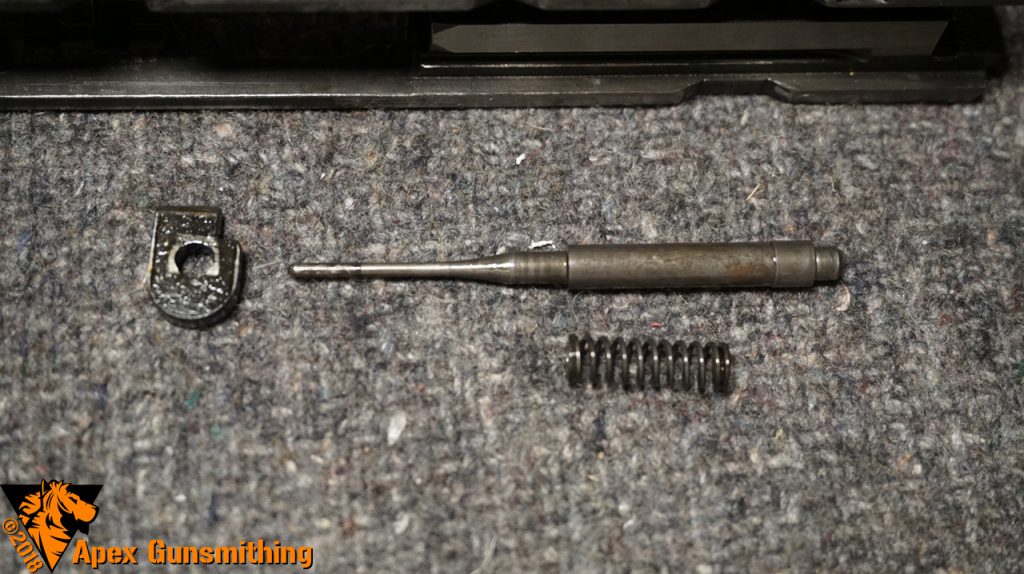
- Remove the firing pin retainer. Push in the back of the firing pin and slide the plate downward. The firing pin spring is somewhat stout, so don’t let it fly off anywhere.
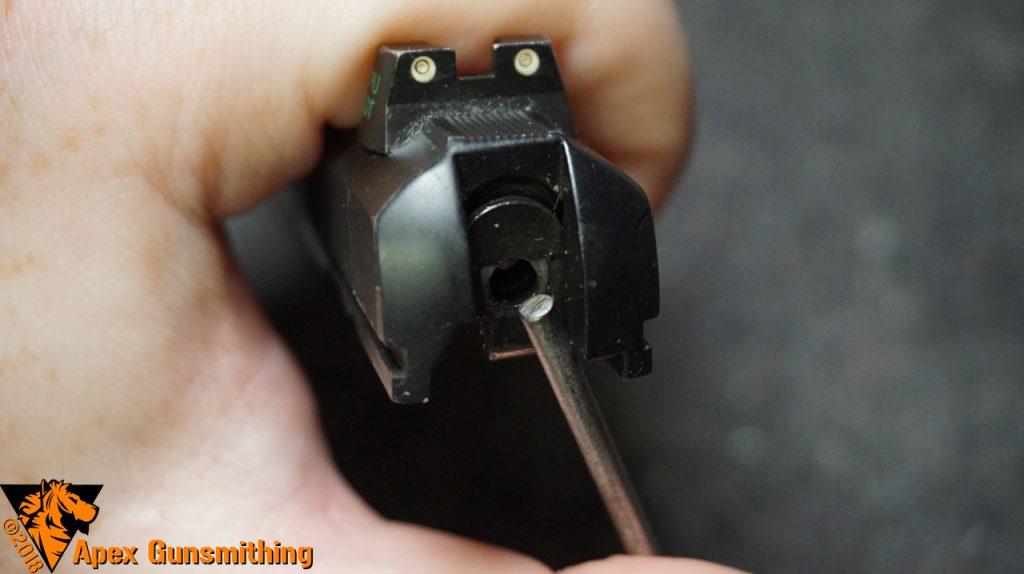
- Tap out the extractor pin. Drive the little pin out from the bottom and out the top. This helps keep vibration from letting the pin slip down into the gun, which would be predictably catastrophic.
- Remove the hammer spring. Depress the cap slightly and push the pin out, then enjoy having to wiggle and wrestle the loop of the sheet steel “magazine brake” sheet out of the plug. The spring can’t go flying on you, but you’ll have to push the retainer back in against the hammer spring to get the whole mess aligned properly. After you’re done fighting it, push the upper pin out to remove the “brake” itself.
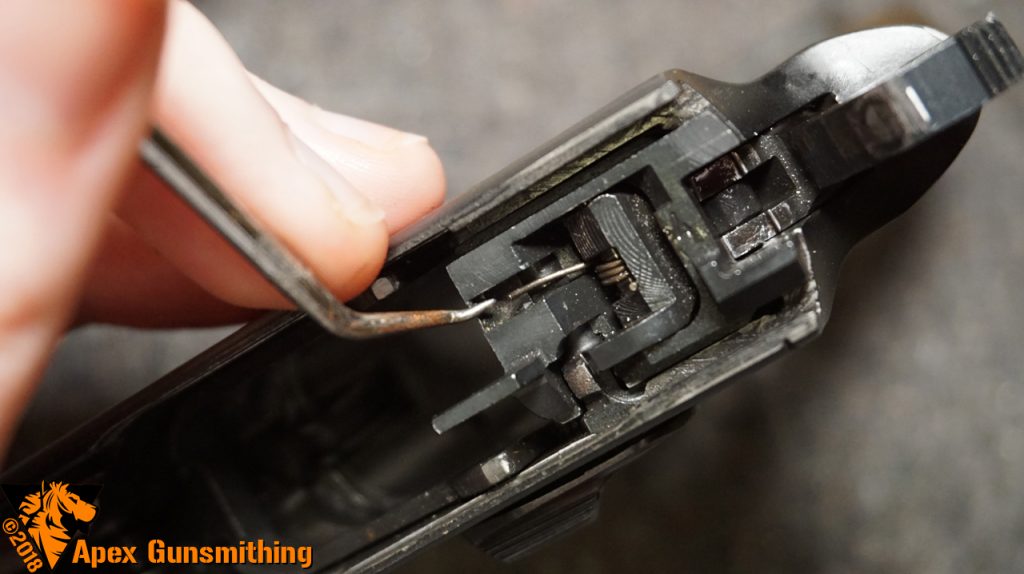
- Remove the thumb safety. This is the scary part of the pre-B model that trips people up, and the secret is a lowly paper clip. A short length of paper clip inserted into the “service hole” in the top of the lever will pass through a hole in the detent, keeping the whole mess together while you remove the lever. On both the pre-B and newer variants the sear spring leg retains the lever, so lift it up and away then carefully work the lever out of the frame. If your paper clip tool worked as intended, you’ll have a little assembly on a skewer like the image below. Don’t panic if it comes apart, but be prepared to have to fiddle and futz with the tiny arrowhead detent against a microscopic spring to pin it back together with your paper clip.
- Lift out the sear cage assembly. With the safety lever out, the sear cage will shift forward and up to remove it. Note the small rails it slots into.
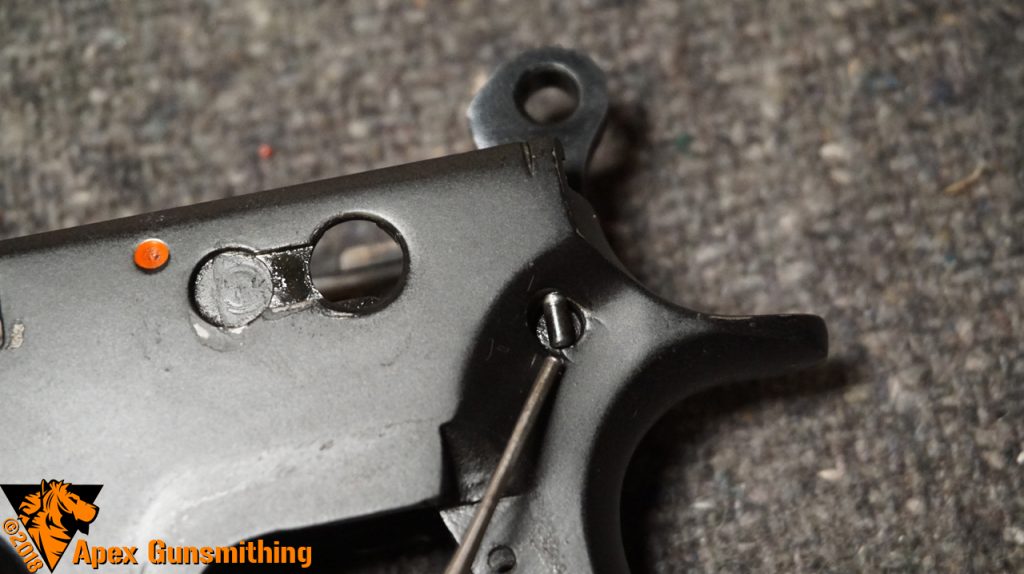
- Take out the hammer and strut. The hammer pin is blocked by a vertical dead ended pin, which can only be removed once the sear assembly is out since it sits on top of the pin hole. No need to take the pin out all the way, just far enough to push the hammer pivot pin through the frame and take out the hammer.
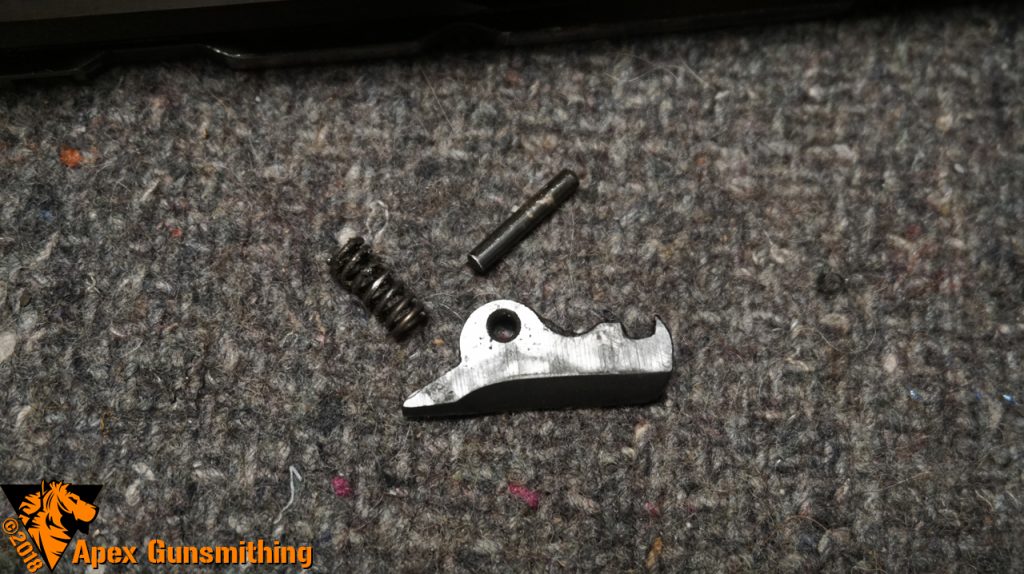
- Strip the sear cage. Here’s another part that people are a bit afraid of, but in reality it’s not really a problem at all. Remember that the long, wavy leg is the one that retains the safety lever and take a good look at the sear itself and how it pivots. There is a sear surface to the rear which engages the hammer’s single action surface, as well as a bent “finger” on the top side that the safety engages against to block the sear when on safe.
- Wait, what about the trigger, trigger bar and mag catch? I’ll be covering those in the guide for the B models. Unfortunately my photos of the trigger bar, spring et al turned out blurry.
Reassembly tips
So you’ve fully stripped your pre-B, cleaned the gunk out of it and now you’re staring at a spread of parts. Working in reverse order, here are a few quick tips to get the more ornery bits back together without too much frustration.
- Use the sear pin partially inserted to guide the spring and sear together. It might seem obvious, but at least in the case of CZs this works especially well.
- There’s nothing awkard about the hammer group, but if you’ve removed the trigger and trigger bar for some reason make sure those go back in before the hammer and DA sear.
- You’ll have to fight a little spring pressure to get the sear cage seated into its rails inside the frame, but once you get it in place you can shove the safety lever through to retain it.
- Speaking of the safety, once you have it lined up you’ll want to carefully ease it in place and when it all looks good quickly seat it and yank your paper clip tool in one go. 60% of the time, it works every time.
- If you look carefully, you can see the gap in the hammer spring retainer cup for the “brake” looped end to fit into. This one is all fighting the spring, sorry!
Conclusion
I’ve always been a fan of Czech small arms, and to me the CZ-75 has certainly earned its place among the best handgun designs of all time. It may have started as a wonder-nine that many American shooters thumbed their noses at but the CZ-75 is here to stay. Thanks to the efforts of CZ Custom and other excellent parts makers the sky is the limit on tricking out your CZ with aftermarket goodies. It is also thanks to CZ Custom that pre-B replacement parts can still be acquired to keep these 80s workhorses running smoothly, even after multiple reworks have taken their toll on sear surfaces and spring life.
I started my small CZ collection many years ago with a CZ-52, back in the days when you could get a 1200-round spam can of Tokarev ammo for under a Benjamin out of any surplus catalog. My early model CZ-97 is one of my prized possessions, so here’s hoping I can pick up a pre-B of my own to keep it company!
Huge thanks to Patreon supporter T.B. for providing this pistol. Without your help, this guide wouldn’t have happened!
I do tutorials and guides in my free time to give back to the firearm community. Each of these guides takes up to five hours to document, photograph, process, research, draft and format! If you want to help keep content flowing, there are a few ways you can pitch in: Loan me a gun or accessory for review, send me questions or ideas for writeups, donate spare gun parts or simply shop at your friendly neighborhood gunsmith!
If this disassembly guide has been useful or helped you out, please consider a small donation via PayPal.
